Showing posts with label healthy. Show all posts

Energy Bites: Healthy & Delicious (For Real!)


I don't know if you have made energy bites of some sort, but I have become a fan of these yummy and healthy snacks.   A while back, my friend Connie gave me a few of these she had made to sample.  After I had one, I immediately texted her, "YUM! I tried them and I need the recipe!"  Then, a few weeks ago it was my snack-bringing week for church and I felt the need to make something a little more substantially nutritious than the biscuits and coffee cake I had made the previous months.  I looked on my Pinterest breakfast board and found this recipe that was pretty much Connie's recipe but with peanut butter instead of almond butter. I had forgotten about the recipe! 

I made a double batch- which yielded 40 something balls.  They were all gone within a few minutes of serving them.  I don't know if people were desperately hungry or they really liked them.  We have lots of kids that congregate around our snack table at church, so I think we can call these delicious when kids and adults ate them, and we can call them healthy since they are chock full of flax seed, chia and oats! 

I made them again for my family this week and we have enjoyed having them for a quick snack or for a breakfast on the go.  I even had one for dessert the other night (though my son believes that despite that fact that they are laced with chocolate chips, they do not qualify for dessert) !

I'm trying to have things on hand that are protein-rich, as my kids tend to reach for crackers, chips, and starches for snacks.  Lately, I've made Hummus and Texas Caviar to have in the refrigerator and try to always keep yogurt and smoothie-making supplies on hand.  If I get my act together to have the good stuff within reach, and prep a couple of things for the week, they have good, tasty, healthy things within reach.  


Energy Bites
Makes about 20

1 cup (dry) old fashioned oatmeal
2/3 cup coconut flakes
½ cup peanut butter (or almond butter- take your pick)
½ cup ground flaxseed
½ cup mini chocolate chips
1/3 cup honey
1 Tbsp. chia seeds
1 tsp. vanilla extract


Stir all ingredients together in a bowl.  Let set in refrigerator for at least 30 minutes.  
Form into small balls (about golf ball size).  
Put in an air tight container and keep in refrigerator. 


If this inspires you to get into healthy oatey bar/bite making, I have two granola bar recipes I love that I wrote about HERE and HERE and my favorite go-to granola recipe HERE, oh and the lovely chewy peanut butter granola HERE.  If you are short on time, these simple but nutritionally dense bites are super easy and quick to put together.  


Chicken Chili on a Chilly January Day


I hope you are having a great start to the new year.  Choosing Happiness is the goal that we set for this new year.  On our road trip home on New Year's Day, Dave and I did some reflecting on 2014 and vision casting for 2015 and realized that last year was more of "survival" year in many respects and we want this year to be marked with more joy, happiness, play and laughter!  I have determined that my motto for this year is: "Complain Less, Hug More, Choose Happiness!"  We'll see how it goes.  So far, I already feel more hopeful.  I realize that when I extend love (via hugs and other extensions of generosity and compassion), it's hard not to be happier.

I'm glad that the bleak, cold, grey days are more than 1/2 way over. In the meantime it helps if I look for the wintery beauty in the midst of the bleak.  And I find great comfort with a piping hot bowl of soup!

 I have made this Chicken Chili several times over the past month.  During the winter, I really just want to eat soup, sliced apples and crusty bread everyday.  Healthy and Comforting!
This recipe has become a new favorite in our house.  I'm delighted to have another soup that is 5 for 5 at my table!  
This is so very easy to make.  In fact, there aren't very many photos because… there is not much to photograph, unless you want photos of me opening cans and stirring.  
Also, this soup is hard to capture in photos because the good stuff tends to sink to the bottom of the bowl and pictures don't do it justice.  
Every year our Social Work department has a chili supper and the faculty/staff provide crock pots of Chili for students to enjoy.  Patsy always makes this Chicken Chili and I always choose it.  It is delicious!  I got the recipe years ago, but was reluctant to make it for the family because my girls are sensitive to spicy (sad!), and my boy has a bean aversion (really sad!).  But Dave loves chili and wishes that I would make it more. So, I decided to make it with mild salsa and reduce the number of beans to accommodate my kids and give it a go.  It was very well received!  I was happily surprised!  It wasn't too spicy and Asher had just come from a 2 hour wrestling practice and was famished and therefore wasn't too picky with the beans!  Progress is being made in the bean situation!
It is a Weight Watchers recipe originally, so it is healthy and is simple and versatile. 
I roast chicken tenderloins in the oven while I "prepare" the rest of the soup.  (The original recipe says to boil them but I prefer the roasted flavor.)  It only takes about 25 minutes to roast and then I tear it apart and add it to the soup.  

I serve it with sour cream and shredded cheese, like the recipe recommends, but I also add some slices of lime, tortilla chips and diced avocado.  OH MY!

I have shared the recipe with a couple of friends and decided that I needed to post it to share with even more friends.  It's too great to not pass along!

Chicken Chili

6 boneless, skinless chicken breasts (or I used about 12 tenderloins)
2 Tbsp. olive oil
2 jars (16 oz. each) of picante salsa
49 oz. chicken broth
48 oz. Northern white beans
1 tsp. cumin
1 tsp. garlic powder

Roast chicken in oven:  Preheat oven to 400˚.  Drizzle or brush chicken with olive oil.  Sprinkle with salt and pepper (and garlic powder and cumin, if you'd like).  Place on baking sheet, place it in the oven and bake until fully cooked.

Mix all other ingredients: salsa through garlic powder.  Shred cooked chicken and add to the pot.  Bring to a boil and cook 20 minutes.  Reduce heat and simmer slowly until time to serve.  (You can also put it in the crockpot in the morning and let it cook on low all day).

Garnish with sour cream, shredded cheese, slices of lime (for squeezing), tortilla chips and diced avocado.  And if you want to turn up the heat, you can splash some hot sauce in your bowl!


Another new year's goal is that I hope I will be able to blog more frequently this year.  Last year was much less often than I would choose (thus, the year of surviving). December was so full and blogging didn't happen after all of the grading and closing down of the semester, and then Christmasing and New Year's travel.  But I sure did cook a lot last month!  And I made some really yummy things, which I photographed for the time when I can post them here and share the recipes.  Some will probably have to wait until next year, as they are Christmasy, but others, I will share promptly - like this Chicken Chili.   
Enjoy! Wishing you the happiest new year!


Hummus: Cracking the Code

                                                   
We play this game in my family, when we cook something that is pretty, or yummy, or special.  We say, "How much do you think this would cost at a restaurant?" And then we speculate about how much it might cost.  Sometimes we actually look up menus online to see what a similar meal out would cost. And then we discuss how much it probably cost to make it at home, which is usually a fraction of the price of buying it out.   

Or when we are at a restaurant eating something that we think we could make at home fairly easily, we then play the game in the opposite way. "I wonder how much it would cost to make this meal at home?", we might say.  And then we try to remember the details of the plate, meal, cookie, (fill in the blank)…so that we can go home and try to recreate it. 

I saw this sticker on a light post when I was in Washington D.C. last spring. 
It inspires me on those days that I don't want to cook.  
 Hummus is one of those things that I buy in a grocery, and buy in a restaurant and make at home. Though I have been making hummus for many years, I have never felt like my homemade hummus was equally as good as bought hummus- until this summer! I had hummus that a friend from church, Christi, made that was the great texture that store-bought has.  She gave me the recipe, which came from Cook's Illustrated  The Science of Good Cooking and gave her tips to me as well.  The trick to the texture is in dealing with the chick pea skin.  It is what can mess with the texture and make it chunky and/or mealy rather than smooth.  Baking soda is the remedy and I have explained in the recipe below how to deal with the skins when using canned beans as well as dried beans.

I have always had an internal conflict with the Tahini aspect of Hummus because it is the most expensive and only fatty part of the recipe.  I have made it without it at times.  However, I do think the Tahini is important- for texture and depth of flavor, but in my recipe I reduced the tahini drastically from the Cook's Illustrated proportions.

The garlic/lemon/spices/salt proportions are purely a matter of personal taste.  So, you will want to make it and then tweak it, taking notes as you do it, so that you find the right amounts for your liking.  (I wrote here about notating recipes.)


my motley taste testers
Another great thing about Hummus made at home is that you can tweak it to your liking.   Some like it zippier, with more lemon; or more garlicky; or herb-y.  We did a taste test at my house. And, as is typical in our home, there was diversity of opinions.  So we divided the hummus and seasoned a small batch of each.

the varieties they came up with :smoky paprika party; moving cumin;
and spicy red (with cayenne pepper)


Ultimate Hummus
adapted from The Science of Good Cooking
(Makes about 2 cups)

½ cup dried chick peas, picked over and rinsed
(¼ cup chick pea cooking water reserved from cooking them)
½ tsp. baking soda
4 Tbsp. lemon juice
2 Tbsp. tahini
2 Tbsp. olive oil
2 small garlic cloves, minced
½ tsp. salt
¼ tsp. ground cumin
pinch of cayenne pepper or smoked paprika (or more to your liking)
(optional- 1 Tbsp minced fresh cilantro, basil, parsley or roasted red pepper)

1. Place beans in a large bowl, cover with 1 quart water, and soak overnight.  Drain.  Bring 1 quart water, beans, and baking soda to a boil in large saucepan over high heat.  Reduce heat to low and simmer gently, stirring occasionally, until beans are tender, about 1 hour.  Drain, reserving ¼ cup bean cooking water, and cool.

2. Combine water & lemon juice in a small bowl or measuring cup.  Whisk together tahini &  2 Tbsp. oil in a second small bowl or measuring cup.

3. Process chickpeas, garlic, salt, cumin, and cayenne in food processor until almost fully ground, about 15 seconds.  Scrape down bowl with rubber spatula.  With processor running, add lemon juice mixture in a steady stream.  Scape down bowl and continue to process for 1 minute.  With processor running, add tahini mixture in steady stream; continue to process until hummus is smooth and creamy, about 15 seconds, scraping down bowl as needed. 
4.Taste and add more ingredients to your liking- lemon, garlic, tahini, salt, oil, or spices

5. Transfer hummus to serving bowl, top with a  sprinkle of paprika, cayenne, herbs and/or a drizzle of olive oil.  Serve. 

(Hummus can be refrigerated for up to a week.  When ready to serve, stir in 1 Tbsp. warm water if texture is too thick).


If you are making from canned chick peas:
Exchange:
1 can chick peas- drained and rinsed for the ½ cup of dried peas
¼ cup tap water to replace the “cooking water”
and 1 ½ tsp. baking soda for the ½ tsp.

And exchange step #1 with this step #1
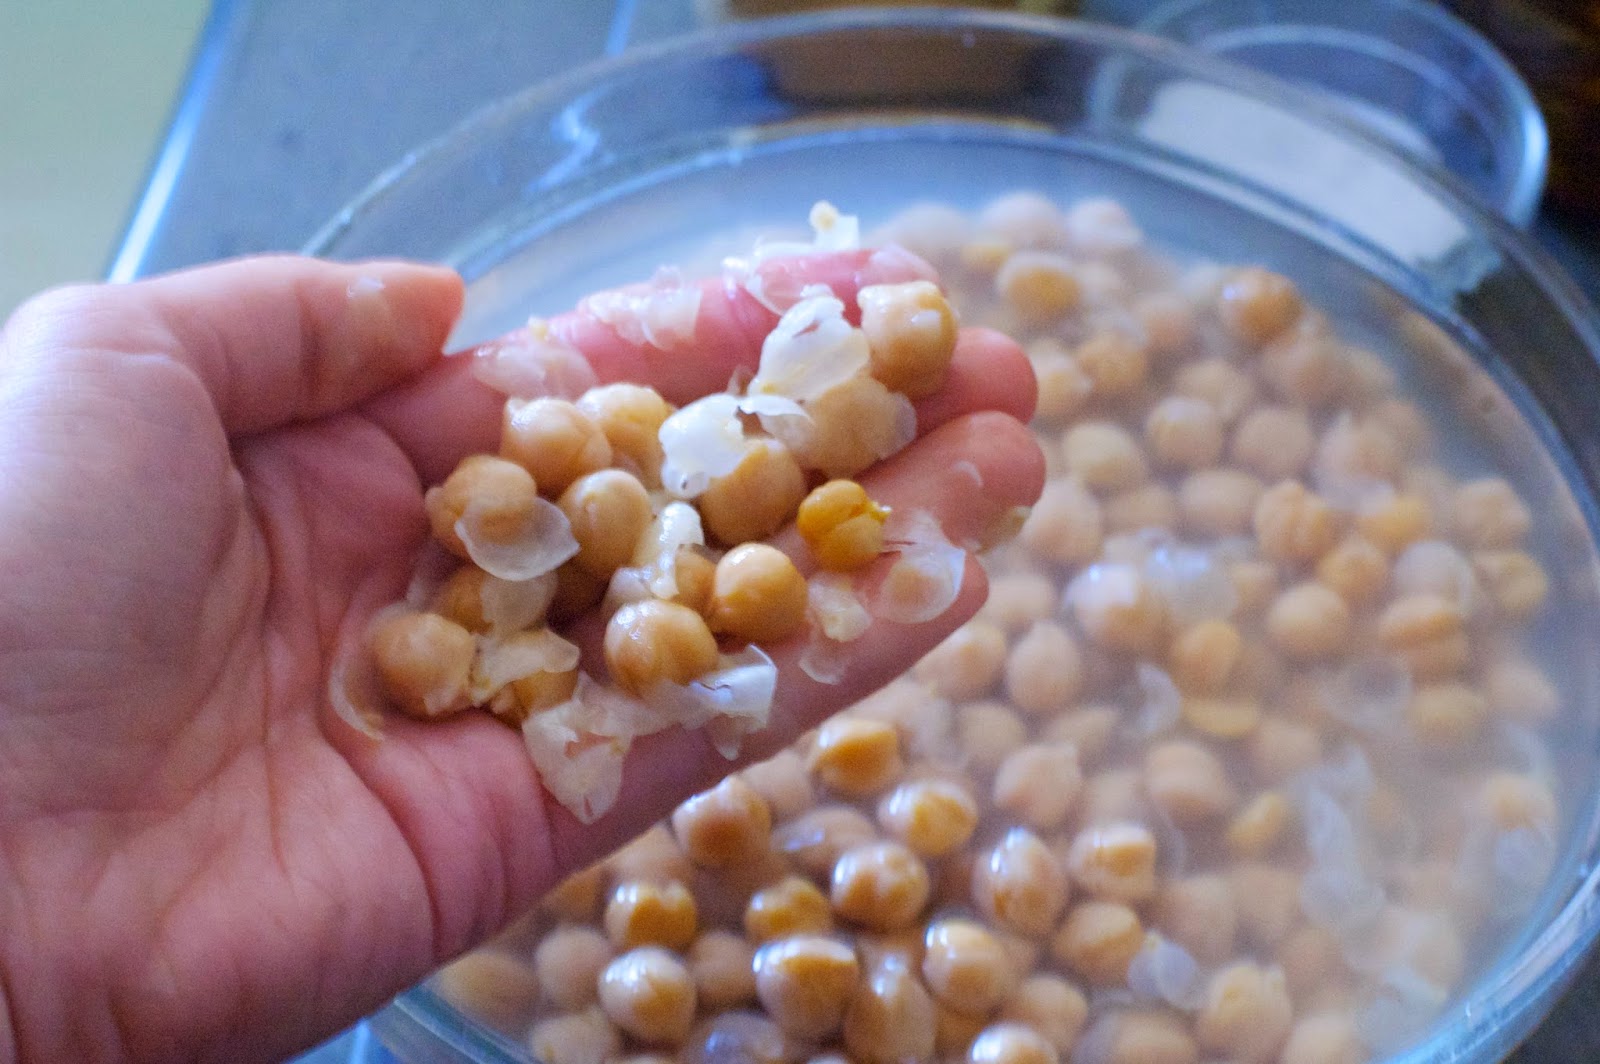
1.     Drain can of beans.  Rinse and drain.  Place in a bowl.  Mix 1 ½ tsp. baking soda with beans and heat in microwave or in a pot on the stove until hot.  Pour into a bowl of water and rub chickpeas vigorously between your hands to get rid of most of the skins.  (They will easily come off and float to the top of the bowl of water – it’s pretty great. )
Change the water 3-4 times to remove all of the baking soda (or it will give a soapy taste).


This was the hummus dinner plate I made the other night.  A pile of greens, topped with sliced tomatoes, olives, feta, greek dressing and a portion of hummus - eaten with some crackers.  I think at Fido, a favorite eatery of ours, their Mediterranean salad, which is similar but with less veggies, is $6.99.   Which adds up when you add beverages and tip 
(and 5 people on the ticket).  Their veggies and hummus bowl is $5.99.  I estimate it costs about $2 to make a batch of hummus. 

P.S. A recent development: Asher, my "I hate beans" son, wrote on his student profile sheet for his new teacher- that his favorite snack was Hummus and Pita Chips.  I was astounded.  This is big y'all. 


Rice & Bean Salad


Do you ever have a recipe that you adore and make all the time, and then for some reason or another it fades out of your repertoire? And then one day you think of it, or see the recipe and say to yourself, “Why haven’t I made this lately? I love this dish!”  And then you make it again and it returns to your rotation of frequently-made-dishes.  This recipe is one of those. 

In the '90s I worked at a lovely stationery store, following college graduation and during graduate school.  I learned so much during those years from the incredible team of women that I worked alongside.  Things that became part of me.  They were a classy bunch (much more refined than I) and yet they loved me and mentored me in many ways.  Molly, a very deliberate and sophisticated lady, was our manager.  She oftentimes would pick up a prepared dish at Bread & Company or The Food Company (which was across the street) to have for lunch or dinner.  One of her go-to dishes was this Rice Salad.  I couldn’t afford to pick up food like that, but I was eager to taste, and then attempt to reproduce things at home.  It was so tasty: zingy, fresh, hearty, and so yummy! 
this is the "recipe" I've had in my recipe box all
these years- the list of ingredients from
Molly's salad

Molly had this brilliant trick. She would walk in, put her personal belongings away, place her food in the fridge, along with her car keys, and be about her day- knowing that she wouldn’t get past the door to head home without remembering her food.  I took note of this ritual and have adopted it in my own life. It's fool proof!

I sometimes wonder (in my very analytical mind) if I could untangle the web of my life and retrace the origins of my philosophies, habits, ideas, and even recipes - what all of the sources would be.  We have each adopted a multitude of things from countless people along our paths- which make us who we are!

If we live with our eyes open, our hearts receptive and our minds curious- we are capable of being shaped by the people around us.  Some things repel or just pass by, but some things stick forever. 

This dish was one of those things that became a staple for me and then went by the wayside and now is coming back. 


1 1/2 cups brown rice- prepared as directed on package
1 can black beans, rinsed and drained
1 1/2 cups grape tomatoes- sliced in half
2 green onions, finely chopped
1 cup crumbled feta cheese (or less if you prefer)
bottled Italian dressing - start with 1/2 cup and add more if needed 

Prepare rice.
My sister and brother-in-law gave us this rice cooker a
few Christmases ago- it is a kitchen tool he has used
that was new to our family.  We use it all the time
now.  It does the work for you, and you can focus on
the rest of the recipe. 
In the meantime, chop tomatoes and green onions. 
Drain and rinse black beans.
Gently toss together rice, beans, tomatoes and onions. 
Add feta.  Toss together.
Add Italian dressing a little at a time, folding in, and adding enough to lightly coat the salad and to your liking.  Season with salt and pepper as desired.


This dish is great because it only takes a few minutes to put together and it keeps well in the refrigerator for several days.  It is great cold or warmed.  It is delicious as a side dish with a piece of grilled meat, or as your main dish. It’s lovely for lunch or dinner.


I decided to use brown rice, to make it even healthier- though not as pretty, in my opinion. It's a recipe you can play around with and find the balance of ingredients you like.  

I made it recently and my girls gobbled it up!  (If you remember, my son is still working through his bean-phobia).  In fact, Lainey asked me this week if I would make it again because she "LOOOVEs it".  Music to my ears!


This was my lunch the other day as I was grading my last batch of exams.  
It was the perfect spring lunch for me.  A crisp sliced apple and a bowl of Rice & Bean Salad. Quick, tasty and filling! 


Chewy Peanut Butter Granola (& Confronting Stereotypes)


We've been talking about Stereotypes in my Human Diversity class this week.  It's been intense and meaningful.  We discussed how stereotypes are those attributes that we project or assume about a person because they belong to a certain group.  (And though this attribute might be true about some people of that group, it is not necessarily true for all people of that group.) 

I asked the students to be courageous and consider stereotypes that they hold – that might be obvious or more latent for them.  We talked about the damaging effects of stereotypes and how they can cause "micro aggressions" to occur.  Micro aggressions are those comments we make or actions we take, that might be careless or jokey, or derogatory to a person that wound people perhaps unbeknownst to the perpetrator.  They might be unconscious acts but they have painful consequences. They occur repetitively, and their impact can be cumulative, "like a thousand paper cuts as opposed to one deep wound".  (Miller, J. & Garran, A., 2008)

This reading asked us to take a personal audit and consider how we might confront stereotypes in our lives.  
1. Think of a racial stereotype you hold that makes you feel uncomfortable.
If you have difficulty identifying one, try to think of something about a person from a different racial or ethnic group that you would not want to discuss with him or her but would be willing to confide to somebody who shares your racial or ethnic identity.

2. What is the stereotype? If you were trying to teach this stereotype to someone else, how would you explain it?
3. What uncomfortable feelings surface when describing this stereotype? It can help to list them.
4. Where might you have learned this, and from whom? (Include multiple sources if you like.)
5. What might have been the historical and social contexts from which this stereotype evolved?
6. What in society or your daily life perpetuates and reinforces the stereotype?
7. What do you know or believe that contradicts this stereotype? 


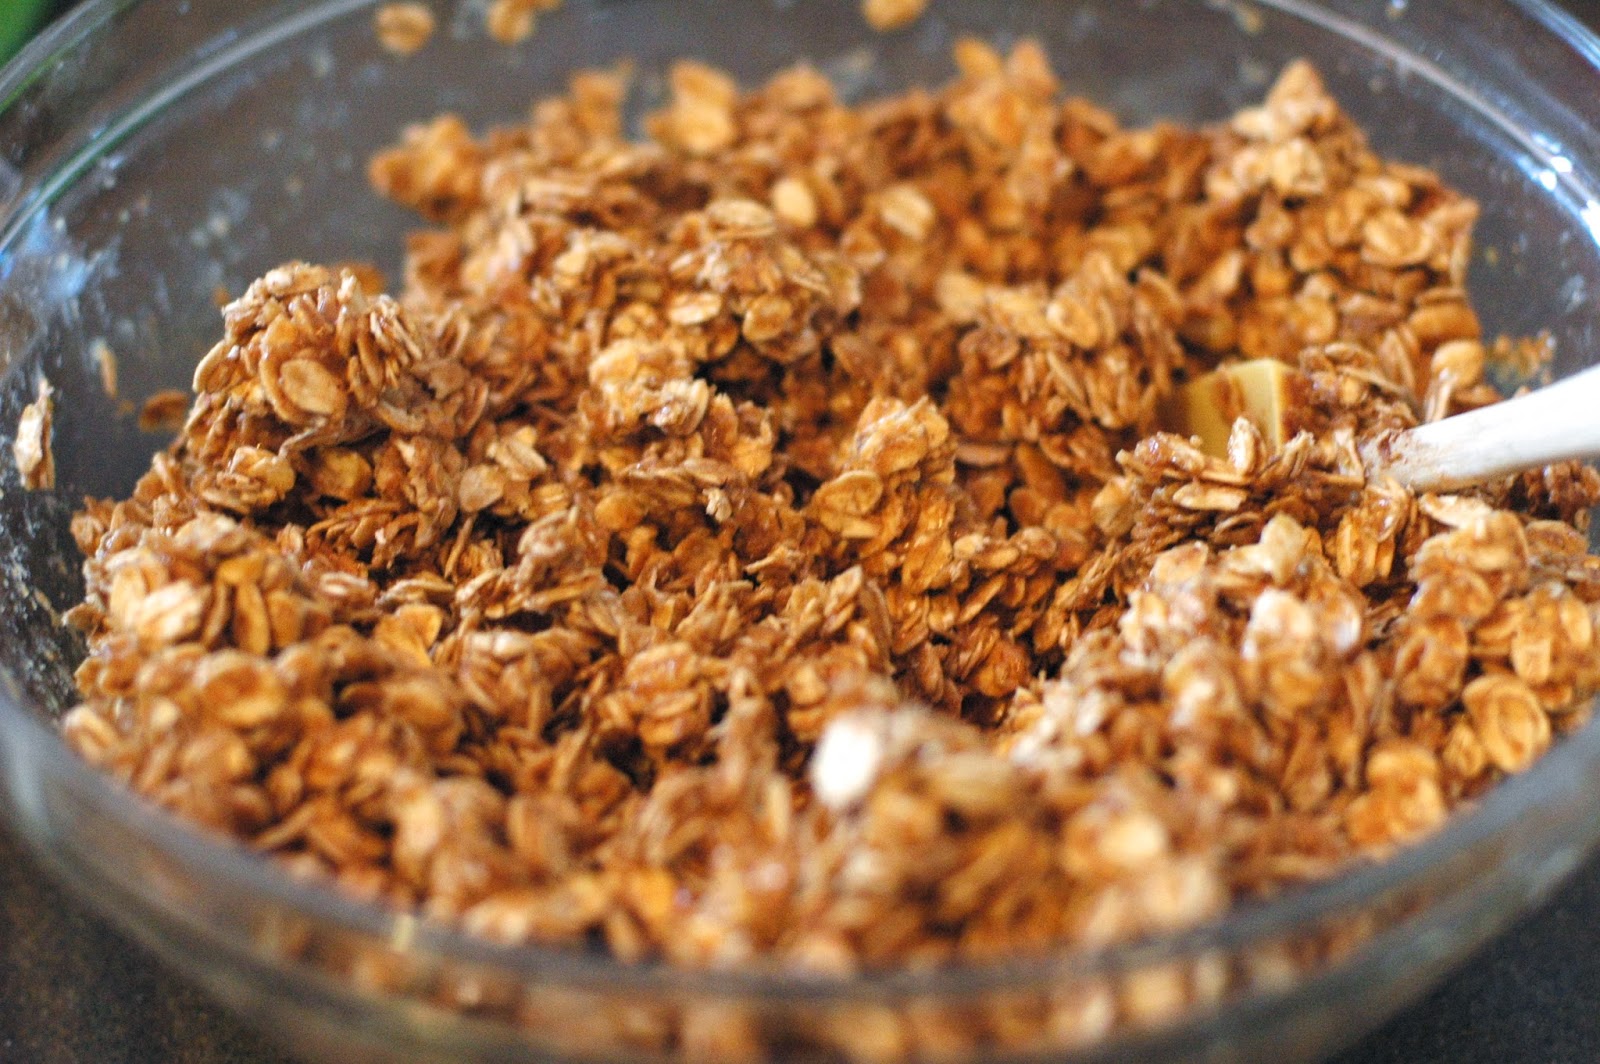
These thoughts were swirling around in my head today, when I was starting to write this blog about Granola.  (I know… I have a lot swirling around in my head and this is going somewhere). I have a granola recipe that I love and make all the time, and share with people, and serve at brunches.  But I recently made this recipe, that my friend Kirsten sent me from SHAPE magazine.  It's peanut buttery and oatey and it is great! But it's different from my other one- this one is chewy, and richer. and doesn't need fruit, and stays in clumps.  It may not be your stereotypical granola. :)
So, I thought I would look up the definition of Granola in the dictionary to see what exactly constitutes Granola, by definition.
Here's what it said:

granola |grəˈnōlə|nouna kind of breakfast cereal consisting typically of rolled oats, brown sugar or honey, dried fruit, and nuts.• as modifier ] chiefly derogatory denoting those with liberal or environmentalist political views, typified as eating health foods.ORIGIN late 19th cent. (as a trademark): from gran- (representing granular or grain-ola. The current term dates from the 1970's.Interesting.  Granola, in its second definition is a stereotypical group of people.  "You know that guy, he's Granola".  So...if you are environmentally bent, and eat healthy foods then you must be "Granola".  I feel that by this definition, I might fit the description. However, I don't think I've ever been called Granola (at least to my face).  Come to think of it, I don't know what group I would be ascribed to.  And maybe that's because I don't want to be pigeonholed, judged, reduced to a label like that.  But who does, really?  
adapted from SHAPE magazine
 
½ cup peanut butter
½ cup honey
3/4 tsp. cinnamon
1 tsp. vanilla
4 cups oats
½ cup wheat germ
anything you want to add-in: mini chocolate chips, dried fruit, chopped nuts

Preheat oven to 325˚. Spray cookie sheet with non-stick cooking spray (or line with parchment paper) and set aside.
Combine peanut butter and honey in a bowl and microwave until peanut butter melts, approximately 20 seconds. (Or do this in a pan on a stovetop). Stir.
Stir cinnamon and vanilla into peanut butter and honey mixture.
Add oats and wheat germ and stir until oats are completely covered in peanut butter mixture.
Spread out oat mixture onto prepared cookie sheet and bake for 8-10 minutes until granola is slightly browned.
 
Let cool until granola is crunchy. Remove from sheet in clumps.

Keep in an airtight container.

(if you decide to add nuts- do so before baking, and if you add a lot of nuts, you might need more of the goo to cover it well). 


If this is way too deep, social justice-oriented, and serious for you, I apologize (kinda).  I couldn't keep myself from sharing this stereotype challenge with all of you- especially on the week we celebrate the life and work of Dr. M.L. King!   Regardless, if you like peanut butter and granola, I recommend you try this easy and delicious recipe.

Older Post ►
 

Copyright 2011 from my home to yours is proudly powered by blogger.com